Complete Guide to Bathroom Renovation in Amsterdam
Welcome to the most comprehensive guide for bathroom renovation in Amsterdam. The unique characteristics of Amsterdam properties—from narrow canal houses to modern apartments—present distinctive challenges and opportunities when renovating bathrooms.
Why Amsterdam Bathroom Renovations Require Special Attention
Welcome to the most comprehensive guide for bathroom renovation in Amsterdam. The unique characteristics of Amsterdam properties—from narrow canal houses to modern apartments—present distinctive challenges and opportunities when renovating bathrooms. This guide combines practical renovation advice with Amsterdam-specific insights to help you navigate every step of your bathroom transformation.
In a city where space is premium and historical preservation often meets modern living, bathroom renovations require thoughtful planning. Whether you’re updating a tiny powder room in a Jordaan apartment or creating a luxury ensuite in Amsterdam Zuid, this guide will equip you with the knowledge to make informed decisions and achieve outstanding results.
Why Renovate Your Bathroom in Amsterdam?
In Amsterdam’s competitive real estate market, bathroom quality significantly impacts property value. Recent market analyses show that well-renovated bathrooms can increase property values by 5-8%, offering an excellent return on investment in a city where property prices continue to climb.
Functionality for Modern Living
Many Amsterdam bathrooms were designed decades—or even centuries—ago. Updating your bathroom allows you to incorporate modern conveniences while respecting the character of your building. From improved storage solutions to energy-efficient fixtures, a renovation transforms daily routines.
Energy and Water Efficiency
With utility costs rising across the Netherlands, a bathroom renovation presents an opportunity to reduce consumption. Modern fixtures can reduce water usage by up to 50%, while improved insulation and efficient heating systems lower energy bills—particularly valuable in older Amsterdam buildings known for their drafts.
Addressing Maintenance Issues
Amsterdam’s high humidity levels and older plumbing systems often lead to moisture-related problems. A renovation allows you to address hidden issues like water damage, outdated pipes, or inadequate ventilation—problems particularly common in basement and ground-floor bathrooms in canal-side properties.
Section 1: Planning Your Amsterdam Bathroom Renovation
Comprehensive Needs Assessment
Before contacting any contractors, conduct a thorough evaluation of your current bathroom:
- Structural assessment: Note any signs of water damage, uneven floors, or cracked tiles that might indicate underlying issues
- Space utilization: Identify awkward layouts or wasted space that could be reconfigured
- Functionality pain points: Document what doesn’t work in your daily routine
- Historical elements: Identify any original features worth preserving (particularly important in monuments or protected buildings)
- Storage requirements: Assess your storage needs based on household size and usage patterns
For Amsterdam residents, it’s particularly important to consider the building’s age and construction. In pre-war buildings, you might encounter unexpected challenges like uneven walls or unconventional plumbing solutions that will affect your renovation approach.
| Feature | Current Status | Desired Improvement |
|---|---|---|
| Water pressure | Low, especially in shower | Upgraded plumbing system with pressure pump |
| Ventilation | Inadequate, causing mold | Installation of quality extraction system |
| Storage | Limited to small medicine cabinet | Wall-mounted vanity with drawers |
| Heating | Outdated radiator taking valuable space | Underfloor heating or towel warmer |
| Layout | Bathtub rarely used, wasting space | Convert to walk-in shower to maximize space |
Budgeting for an Amsterdam Bathroom Renovation
Amsterdam renovation costs typically exceed national averages due to logistical challenges, higher labor costs, and potential restrictions in protected buildings. Here’s a detailed breakdown to consider:
| Renovation Type | Average Cost Range | What’s Included |
|---|---|---|
| Basic Refresh | €6,000 – €10,000 | New fixtures, basic tiling, minimal layout changes |
| Mid-Range Renovation | €10,000 – €20,000 | Quality fixtures, custom vanity, complete retiling, minor layout changes |
| Luxury Remodel | €20,000 – €40,000+ | Premium fixtures, custom cabinetry, heated floors, shower systems, major layout changes |
Amsterdam-specific cost factors to keep in mind:
- Access challenges: Narrow staircases and limited street parking can increase labor costs by 10-15% compared to more accessible locations
- Monument restrictions: Listed buildings may require specialized approaches, increasing costs by 20-30%
- VvE approvals: Apartment buildings with homeowners’ associations may require specific materials or approaches
- Structural adaptations: Many Amsterdam buildings have wooden floors that may need reinforcement for heavy elements like stone bathtubs
For a well-balanced Amsterdam bathroom renovation, consider this allocation:
- 30-35% Fixtures and fittings (toilet, shower, bath, sink, taps)
- 15-20% Tiling and waterproofing
- 15-20% Labor (installation)
- 10-15% Plumbing and electrical work
- 5-10% Ventilation solutions
- 10-15% Contingency fund for unexpected issues
Expert Tip: In Amsterdam’s older buildings, allocate a higher percentage (15-20%) to your contingency fund, as unexpected issues like hidden water damage or outdated wiring are more common.
Realistic Timeline Planning
Bathroom renovations in Amsterdam typically take longer than in newer buildings or suburban areas due to several factors:
| Phase | Timeframe | Considerations |
|---|---|---|
| Planning & Design | 2-4 weeks | Includes measuring, drafting plans, selecting materials |
| Permitting & Approvals | 1-8 weeks | VvE approval can take 4-6 weeks; monument permits can take longer |
| Demolition | 2-3 days | Longer in older buildings with multiple layers of previous renovations |
| Structural Work | 3-7 days | If floor reinforcement or wall modifications are needed |
| Plumbing & Electrical | 3-5 days | Can take longer in historic buildings with outdated systems |
| Waterproofing | 1-2 days | Critical in Amsterdam’s humid climate |
| Tiling | 3-7 days | Depends on complexity and pattern |
| Fixture Installation | 2-4 days | Timing depends on complexity and availability |
| Finishing Work | 2-3 days | Includes sealing, painting, accessories installation |
| Total Duration | 4-8 weeks | Add buffer time for Amsterdam-specific delays |
Common causes of delay:
- Material delivery delays: Imported materials can face customs delays
- Parking permits: Arranging permits for loading/unloading in central Amsterdam can add days
- Neighbor considerations: In attached buildings, work hours may be restricted
- Discovery of hidden issues: Particularly common in buildings 50+ years old
Section 2: Design & Layout Strategies for Amsterdam Bathrooms
Different neighborhoods and building types in Amsterdam lend themselves to specific bathroom styles.
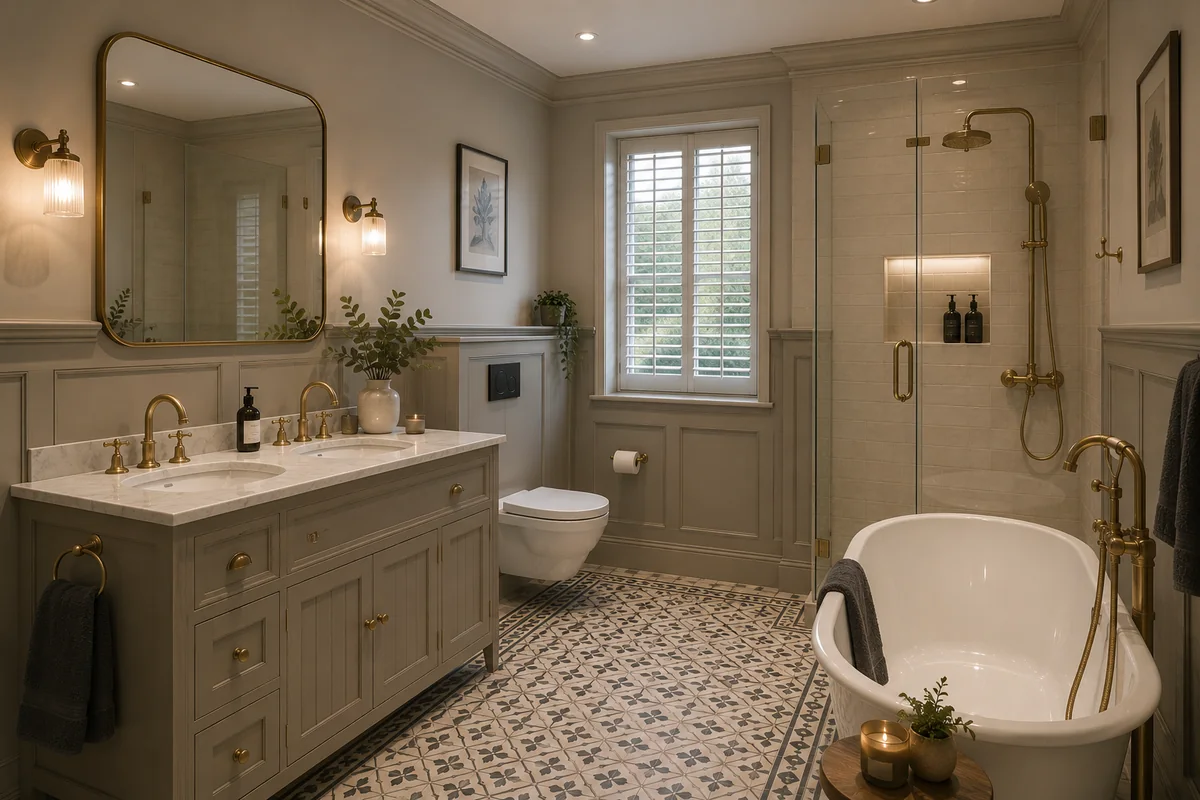
Canal Houses & Historic Properties
These historic properties benefit from designs that honor their heritage while incorporating modern amenities:
- Traditional elements: Claw-foot tubs, porcelain fixtures, and subway tiles respect the historical context
- Modern touches: Heated floors, improved lighting, and hidden storage add contemporary comfort
- Color palettes: Soft blues (referencing Dutch Delft traditions) paired with whites create a classic look
- Space solutions: Vertical storage, wall-mounted fixtures, and strategic mirrors maximize limited space
Pre- and Post-War Apartments
Many Amsterdam South and West properties fall into this category:
- Mid-century modern: Clean lines, geometric patterns, and boldly colored accent tiles
- Space efficiency: Compact fixtures, combination bath/showers, and recessed storage
- Material choices: Terrazzo-inspired flooring, ceramic tiles, and chrome fixtures
- Layout improvements: Converting traditional configurations to more efficient modern layouts
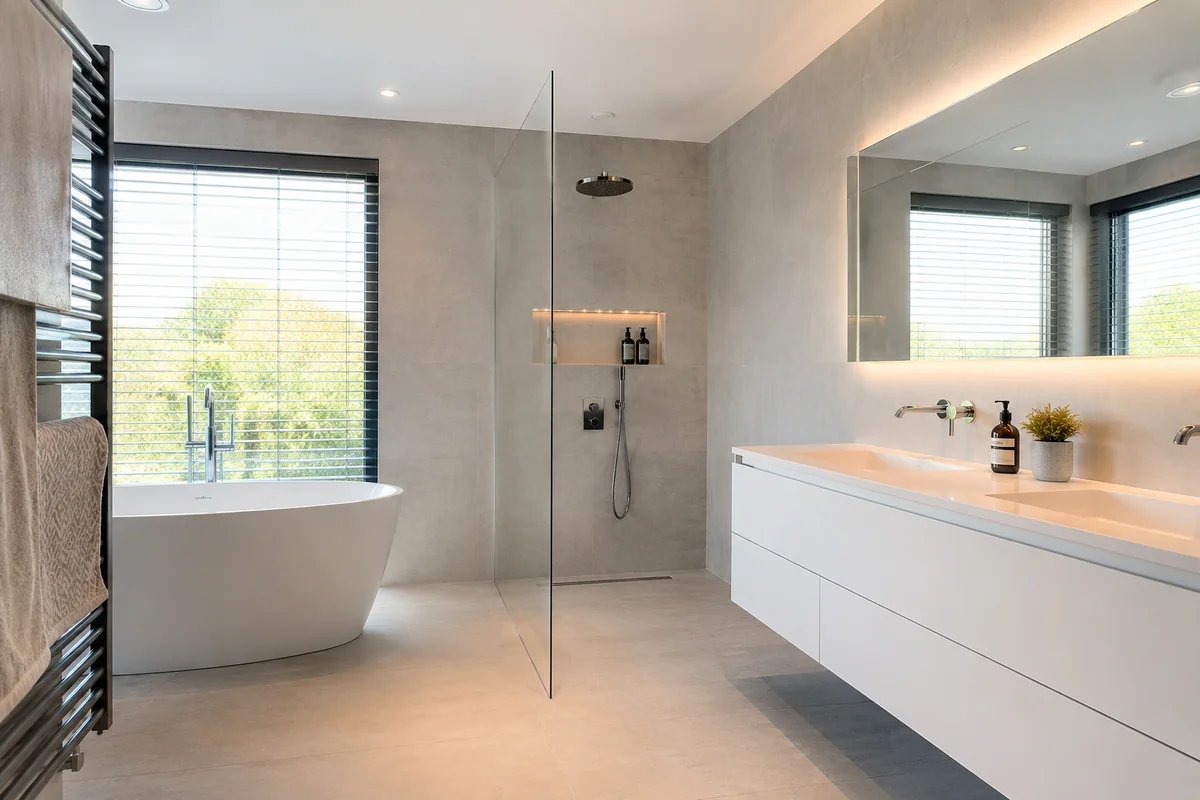
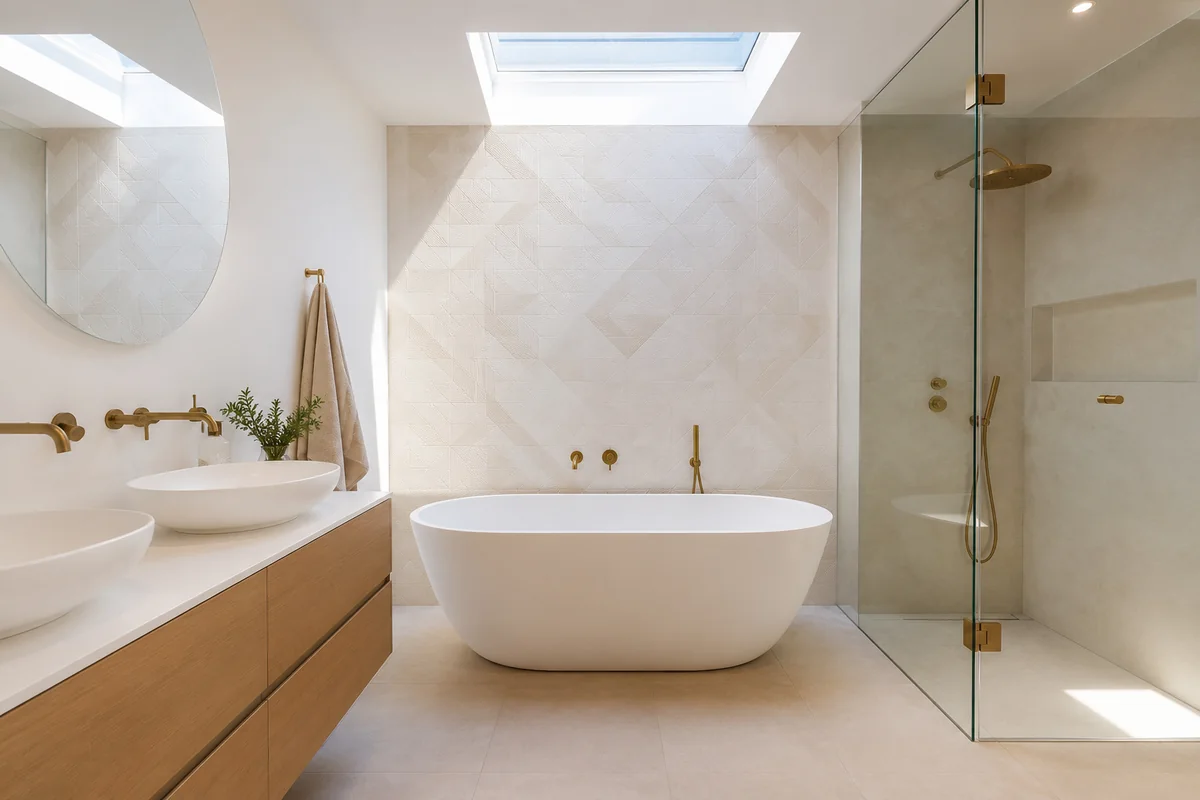
Modern Developments
For newer buildings in areas like IJburg, Zuidas, or renovation projects in transformed industrial buildings:
- Minimalist aesthetics: Clean lines, hidden drainage, wall-hung fixtures
- Smart technology: Digital shower controls, heated mirrors, and integrated lighting
- Sustainable materials: Recycled glass tiles, water-efficient fixtures, and energy-saving systems
- Open concepts: Barrier-free showers, floating vanities, and seamless transitions
Layout Optimization for Amsterdam’s Unique Spaces
Amsterdam bathrooms are notoriously compact, requiring creative space utilization:
- Vertical thinking – utilize wall height for storage and visual interest: floor-to-ceiling cabinet towers, vertical tile patterns to create the illusion of height, and multi-level storage solutions
- Niche creation – convert awkward spaces into functional elements: shower niches in place of caddies, recessed medicine cabinets, and under-stair storage in split-level apartments
- Visual expansion techniques – large-format mirrors to double perceived space, continuous flooring into shower areas to extend visual flow, and glass shower enclosures instead of curtains or solid walls
- Multi-functional elements – shower-bath combinations with high-quality glass screens, vanities with integrated laundry solutions, and toilets with built-in bidets to eliminate additional fixtures
| Building Type | Common Challenges | Recommended Solutions |
|---|---|---|
| Canal House | Narrow, irregular spaces; sloping floors | Custom-built fixtures; waterproofing focus; reinforced flooring |
| Pre-War Apartment | Limited plumbing access; shared walls | Sound insulation; compact fixtures; vertical storage |
| Post-War Apartment | Concrete construction limiting changes | Surface-mounted solutions; decorative screening of existing pipes |
| Modern Development | Often standardized, cookie-cutter spaces | Statement fixtures; texture and color to add character |
Amsterdam-Specific Layout Innovations
- Toilet separation: In the Dutch tradition, consider separating the toilet from the main bathroom for improved functionality
- Wet room conversions: Particularly effective in basement levels of canal houses prone to moisture
- Light wells: In buildings with limited natural light, consider light tubes or creative artificial lighting
- Heat retention: Given Amsterdam’s cold winters, incorporate heated elements (floors, towel racks) for comfort
Section 3: Materials & Fixtures Selection
Tiles are perhaps the most important visual element in your bathroom renovation:
| Tile Type | Pros | Cons | Best Applications |
|---|---|---|---|
| Porcelain | Extremely durable; wide range of designs; low maintenance | Higher cost than ceramic; harder to cut | Flooring; shower surrounds; high-traffic areas |
| Natural Stone | Unique patterns; luxury feel; excellent resale value | Requires sealing; more maintenance; heavier | Feature walls; accent areas; luxury master bathrooms |
| Ceramic | Cost-effective; wide variety; easier to cut | Less durable than porcelain; more water absorption | Walls; lower-traffic areas; rental properties |
| Cement | Customizable colors; artisanal appearance; on-trend | Requires sealing; can stain; more maintenance | Feature floors; statement walls; industrial-style bathrooms |
| Glass | Reflective properties; vibrant colors; waterproof | Can chip or crack; shows water spots; expensive | Accent strips; backsplashes; shower niches |
Amsterdam-specific tile considerations:
- Water resistance: Amsterdam’s humid climate demands highly water-resistant options, particularly in ground-floor and basement bathrooms
- Weight: For upper floors in canal houses, consider lighter options that won’t stress historic wooden structures
- Underfloor heating compatibility: Verify that your tile choice works well with heated flooring systems
- Local suppliers: Consider Dutch tile manufacturers like Mosa for quality and reduced environmental impact
- Traditional Dutch influences: Consider incorporating Delft-inspired tiles as accents for a local touch
Plumbing Fixtures & Hardware
The right fixtures balance aesthetic appeal with practical performance:
| Option | Suitability for Amsterdam | Considerations |
|---|---|---|
| Walk-in Shower | Excellent for space optimization | Requires proper waterproofing; consider frameless glass for visual spaciousness |
| Bathtub-Shower Combo | Good for family homes with limited space | Look for quality screens rather than curtains; consider shorter tubs (150cm) |
| Freestanding Bath | Best for larger bathrooms in canal houses | Check floor strength; consider weight; make statement with classic styles |
| Wet Room | Ideal for basement levels or accessible needs | Requires excellent waterproofing and drainage; simplifies cleaning |
| Compact Tubs | Good for apartments with limited space | Japanese-style deep soaking tubs maximize relaxation in minimal footprint |
Many Amsterdam buildings suffer from low water pressure, particularly in upper floors of taller buildings:
- Pressure-boosting pumps: Ideal for upper floor apartments
- Thermostatic mixers: Maintain temperature despite pressure fluctuations
- Low-pressure compatible fixtures: Specially designed showerheads that perform well with lower pressure
- Gravity-fed systems: Consider for major renovations in tall canal houses
| Type | Benefits | Amsterdam Considerations |
|---|---|---|
| Wall-Hung | Space-saving; easier cleaning; modern appearance | Requires sufficient wall depth; may need reinforcement in older buildings |
| Comfort-Height | Ergonomic; accessibility-friendly | Minimal space impact with significant comfort improvement |
| Dual-Flush | Water savings; eco-friendly | Compatible with Amsterdam water systems; reduced utility costs |
| Smart Toilets | Integrated washing functions; reduced paper use | Requires electrical connection; becoming more popular in luxury renovations |
Storage Solutions for Amsterdam Bathrooms
Creative storage is essential in Amsterdam’s typically compact bathrooms:
- Recessed cabinets: Utilize wall depth for storage without protruding into the room
- Floating vanities: Create the illusion of more floor space while providing storage
- Over-toilet solutions: Utilize often-wasted vertical space
- Custom niches: Built-in solutions that work with unusual wall angles common in older buildings
- Mirrored cabinets with integrated lighting: Combine functions to save space
Amsterdam’s humidity demands moisture-resistant cabinetry materials:
- Marine-grade plywood: Superior moisture resistance for custom cabinetry
- Solid surface materials: Seamless, non-porous surfaces ideal for damp environments
- Powder-coated metals: Rust-resistant options for shelving and accessories
- Teak and other water-resistant woods: Natural options that can handle bathroom humidity
Section 4: Finding the Right Contractor in Amsterdam
Amsterdam-Specific Qualifications to Look For
When hiring a bathroom renovation contractor in Amsterdam, seek these specific qualifications:
- Experience with Amsterdam buildings: Look for contractors with proven experience in buildings similar to yours (canal houses, pre-war apartments, etc.)
- VvE navigation expertise: For apartment renovations, experience dealing with homeowners’ associations is invaluable
- Monument experience: If your building is protected, specialized knowledge is essential
- Multi-lingual capability: Communication is clearer if your contractor speaks your preferred language
- Proper registrations: Verify KvK registration and appropriate insurance
Vetting Process
Follow this enhanced vetting process:
- Portfolio review: Request photos of completed Amsterdam projects, particularly in buildings similar to yours
- Site visits: Ask to see in-progress work or completed projects in person if possible
- Client references: Speak with previous clients specifically about timeline adherence and problem-solving
- Detailed quotations: Compare quotes that include material specifications and labor breakdowns
- Contract review: Ensure contracts include contingency plans, payment schedules, and warranty information
Red Flags When Choosing an Amsterdam Contractor
Be wary of contractors who:
- Cannot provide references from Amsterdam-based projects
- Offer unusually low quotes compared to competitors
- Are unwilling to obtain necessary permits or approvals
- Require large upfront payments (more than 20-30%)
- Cannot provide a realistic timeline for Amsterdam-specific challenges
- Are unfamiliar with VvE requirements or monument restrictions
Want the full checklist? Read our guide on how to choose the right bathroom contractor in Amsterdam.
Section 5: Permits and Regulations in Amsterdam
Navigate the Amsterdam Permit System
Understanding when permits are required can save time and prevent legal issues:
- Structural changes: Moving load-bearing walls, creating new doorways
- Major plumbing relocations: Particularly those affecting shared building systems
- Electrical system upgrades: When increasing capacity or making significant changes
- Monument alterations: Any changes to buildings with monument status
- Facade modifications: Changes affecting external appearance, including windows
| Classification | Permit Requirements | Renovation Restrictions |
|---|---|---|
| Rijksmonument (National Monument) | Extensive permits required; review process can take months | Strict limitations on changes; original features must be preserved |
| Gemeentelijk Monument (Municipal Monument) | Local approval required; somewhat more flexible than Rijksmonument | Moderate restrictions; visible historical elements must be maintained |
| Beeldbepalend Pand (Characteristic Building) | Some restrictions, particularly for exterior changes | Focus on preserving street-facing appearance; more flexibility for interiors |
| Standard Building | Regular building permits for structural changes | Standard building code compliance |
Navigating Homeowners’ Associations (VvE)
If you live in an apartment building, understand these VvE considerations:
- Required approvals: Most VvEs require written approval before bathroom renovations begin
- Documentation needs: Typically include detailed plans, contractor information, and timeline
- Common restrictions: Limited renovation hours (often 8:00-17:00 weekdays only), noise restrictions, specific requirements for waterproofing, approved waste disposal methods, and access restrictions for contractors
- Approval process: Allow 4-6 weeks for VvE approval in most cases
Water and Ventilation Regulations
Amsterdam’s building codes place special emphasis on:
- Waterproofing standards: Stringent requirements for wet areas, particularly in multi-unit buildings
- Ventilation requirements: Mechanical ventilation is typically required in bathrooms without windows
- Water pressure regulations: Modifications must not negatively impact other building residents
- Drainage specifications: Proper slopes and approved drainage solutions are mandatory
Section 6: Step-by-Step Renovation Process
Pre-Renovation Preparation
Before demolition begins, complete these critical steps:
- Document existing conditions: Photograph all areas, including plumbing and electrical connections
- Create a detailed work schedule: Establish clear milestones and decision points
- Order materials with long lead times: Custom items may take 6-8 weeks for delivery
- Arrange alternative bathroom access: Plan for how household members will cope during renovation
- Notify neighbors: As a courtesy, inform adjacent neighbors of upcoming work
- Protect access areas: Cover floors, stairs, and doorways to prevent damage during material transport
- Secure valuables: Remove and safely store any valuable items from work zones and access paths
The Demolition Phase
Proper demolition sets the stage for a successful renovation:
- Careful fixture removal: Salvage items for donation or recycling where possible
- Controlled demolition: Systematic removal working from top to bottom
- Surface preparation: Complete removal of old sealants, adhesives, and compromised materials
- Hidden condition assessment: Thorough inspection of revealed structure, plumbing, and electrical
- Problem remediation: Address any discovered issues before proceeding
- Waste management: Proper sorting and disposal following Amsterdam regulations
Be prepared to address these frequently discovered problems:
- Rot in wooden subfloors: Common in buildings 50+ years old
- Previous improper waterproofing: Often found behind old tile work
- Outdated lead or galvanized pipes: Common in pre-1970s buildings
- Inadequate electrical grounding: Safety issue in older buildings
- Hidden moisture damage: Particularly around windows or external walls
Construction and Installation Sequence
Follow this optimal sequence for efficient bathroom renovation:
- Structural modifications: Any wall removals or doorway changes
- Rough plumbing: Installation of new supply and drainage lines
- Electrical updates: New wiring, outlets, lighting connections
- Ventilation installation: Exhaust fans and associated ductwork
- Subfloor preparation: Leveling, reinforcement, and waterproofing
- Wall preparation: Backerboard installation, waterproofing membrane application
- Underfloor heating installation: If applicable
- Tile installation: Floors first, then walls
- Fixture mounting: Toilet, shower, bath, vanity installation
- Final plumbing connections: Hooking up all fixtures to supply and drainage
- Electrical finish work: Installing switches, outlets, lighting fixtures
- Cabinet and storage installation: Vanities, medicine cabinets, shelving
- Finishing touches: Mirrors, towel bars, hooks, shower doors
- Silicone sealing: All joints and connections
- Final cleaning: Complete removal of construction dust and residue
Quality Control Checklist
Before final payment, verify these essential quality points:
- Water pressure test: Check all fixtures for proper flow and pressure
- Drainage test: Ensure all drains function properly without backup
- Shower leak test: Run shower for 10-15 minutes to check for leaks
- Fixture stability: Verify all mounted elements are secure
- Electrical safety: Test GFCI protection and all electrical components
- Ventilation performance: Confirm proper operation of exhaust systems
- Door and drawer function: Check all moving parts for smooth operation
- Silicone sealing completeness: Inspect all edges and transitions
- Grout consistency: Check for complete, even grout lines without voids
- Tile lippage: Ensure tiles are even without protruding edges
Section 7: Special Considerations for Amsterdam Properties
Small Space Solutions for Typical Amsterdam Bathrooms
Amsterdam is known for compact living spaces. Here are strategies specifically for small bathrooms:
- Corner solutions: Utilize corner sinks and toilets to maximize floor space
- Glass panel showers: Skip the shower door in favor of a single glass panel
- Wall-mounted everything: Keep the floor as clear as possible
- Pocket doors: Save space taken up by door swings
- Custom sizing: Standard fixtures often waste space; consider made-to-measure options
- Light colors: Create the illusion of more space with lighter tones
- Mirror placement: Strategically place mirrors to reflect light and visually double space
- Shower niches: Build storage into wall thickness rather than adding accessories
- Continuous flooring: Use the same flooring throughout to create visual flow
- Sliding solutions: Consider sliding doors for cabinets and shower enclosures
Moisture Control in Amsterdam’s Climate
Amsterdam’s maritime climate presents specific moisture challenges:
- Enhanced ventilation: Consider higher-capacity fans than standard
- Dehumidification options: Built-in dehumidifiers for windowless bathrooms
- Mold-resistant materials: Select paint and grout with antimicrobial properties
- Thermal bridges: Address cold spots where condensation forms
- Heating solutions: Properly sized heating to maintain consistent temperature
- Window treatments: Moisture-resistant options for bathroom windows
- Advanced waterproofing: Consider newer membrane systems rather than traditional methods
- Extended exhaust timers: Fan systems that continue running after bathroom use
Historical Preservation Techniques
For renovating bathrooms in Amsterdam’s many historic buildings:
- Reversible adaptations: Changes that can be undone in the future
- Compatible materials: Choose options that work with original building materials
- Period-appropriate design: Respect the building’s era while adding modern function
- Preservation of original elements: Restore rather than replace when possible
- Careful documentation: Record hidden historical elements discovered during renovation
- Specialist consultation: Work with preservation experts for monument properties
- Traditional techniques: Consider traditional Dutch building methods where appropriate
Section 8: Sustainable Bathroom Renovation in Amsterdam
Water Conservation Solutions
Amsterdam is increasingly focused on water management. Consider these options:
- Ultra-low-flow toilets: Models using 4.5 liters or less per flush
- Greywater systems: Reuse shower water for toilet flushing
- Flow reducers: Add to existing fixtures to reduce consumption
- Thermostatic mixers: Reduce water waste while adjusting temperature
- Rainwater collection: More complex but possible for toilet flushing systems
- Sensor faucets: Eliminate running water when not in use
Energy Efficiency Improvements
Reduce energy consumption with these approaches:
- LED lighting: Consume 75% less energy than traditional bathroom lighting
- Heat recovery systems: Capture heat from shower drain water
- Efficient ventilation: Humidity-sensing fans that run only when needed
- Proper insulation: Behind walls and under floors to retain heat
- Smart controls: Programmable systems to optimize heating and ventilation
- On-demand water heating: Point-of-use heaters to reduce water and energy waste
Sustainable Material Selection
| Material Category | Sustainable Options | Benefits |
|---|---|---|
| Flooring | Cork; recycled glass tile; sustainable bamboo | Renewable resources; recycled content; durability |
| Wall coverings | Clay plaster; recycled tiles; FSC-certified wood | Low chemical emissions; recycled content; responsible sourcing |
| Fixtures | Water-efficient models; recycled metals | Reduced water consumption; circular economy support |
| Countertops | Recycled glass; sustainably sourced stone; bio-based materials | Lower environmental impact; recycled content |
| Cabinetry | Formaldehyde-free materials; reclaimed wood; locally sourced timber | Lower emissions; waste reduction; reduced transportation impact |
Local Amsterdam Resources for Eco-Friendly Renovation
Several Amsterdam-based businesses specialize in sustainable bathroom solutions:
- Eco-material suppliers: Specialists in natural and recycled materials
- Water conservation experts: Consultants for optimal water-saving strategies
- Energy efficiency contractors: Specialists in reducing bathroom energy consumption
- Circular economy participants: Companies focused on material reuse and recycling
- Green certification experts: Guidance for meeting sustainability standards
Section 9: Aftercare & Maintenance
Amsterdam-Specific Maintenance Considerations
The city’s unique environment affects bathroom longevity:
- Hard water management – Amsterdam’s water can leave mineral deposits: install water softeners for fixture protection, use vinegar solutions for regular descaling, and consider glass treatments for shower doors
- Humidity control – the city’s damp climate requires vigilance: maintain ventilation systems regularly, check caulking and grout lines seasonally, and address condensation issues promptly
- Seasonal adjustments – adapt to Amsterdam’s seasonal changes: increase ventilation in summer months, check heating systems before winter, and adjust humidity controls seasonally
Cleaning Products for Different Surfaces
| Surface | Recommended Cleaning | Products to Avoid |
|---|---|---|
| Natural stone | pH-neutral cleaner; stone-specific products | Acidic cleaners (vinegar, citrus); abrasives |
| Porcelain | Mild soap; specialized tile cleaner | Harsh abrasives; oil-based products |
| Glass | Vinegar solution; squeegee after use | Abrasive powders; harsh chemicals |
| Fixtures | Manufacturer-recommended products; soft cloth | Acidic cleaners on metal; abrasive pads |
| Wooden elements | Minimal water; specialized wood cleaners | Excess moisture; harsh chemicals |
Professional Maintenance Schedule
| Timeframe | Recommended Service |
|---|---|
| Monthly | Deep clean grout lines; descale showerheads |
| Quarterly | Check and clean drains; inspect caulking |
| Annually | Professional grout sealing; plumbing inspection |
| 2-3 Years | Silicone replacement; ventilation system cleaning |
| 5 Years | Consider partial updates (fixtures, hardware) |
| 10-15 Years | Evaluate for potential full renovation |
Section 10: Inspiration Gallery and Case Studies
Neighborhood-Specific Design Inspiration
Different Amsterdam neighborhoods have distinctive architectural characteristics that can inspire your bathroom design.
Jordaan – cozy, character-filled designs that maximize charm in minimal space:
- Vintage-inspired fixtures
- Classic subway tiles with dark grout
- Repurposed antique furniture as vanities
- Brass or copper accents
- Space-saving corner solutions
Amsterdam Zuid – sophisticated designs inspired by the city’s upscale southern neighborhood:
- Marble or marble-look surfaces
- Geometric Art Deco influences
- Built-in storage with clean lines
- Monochromatic color schemes with metallic accents
- Statement lighting fixtures
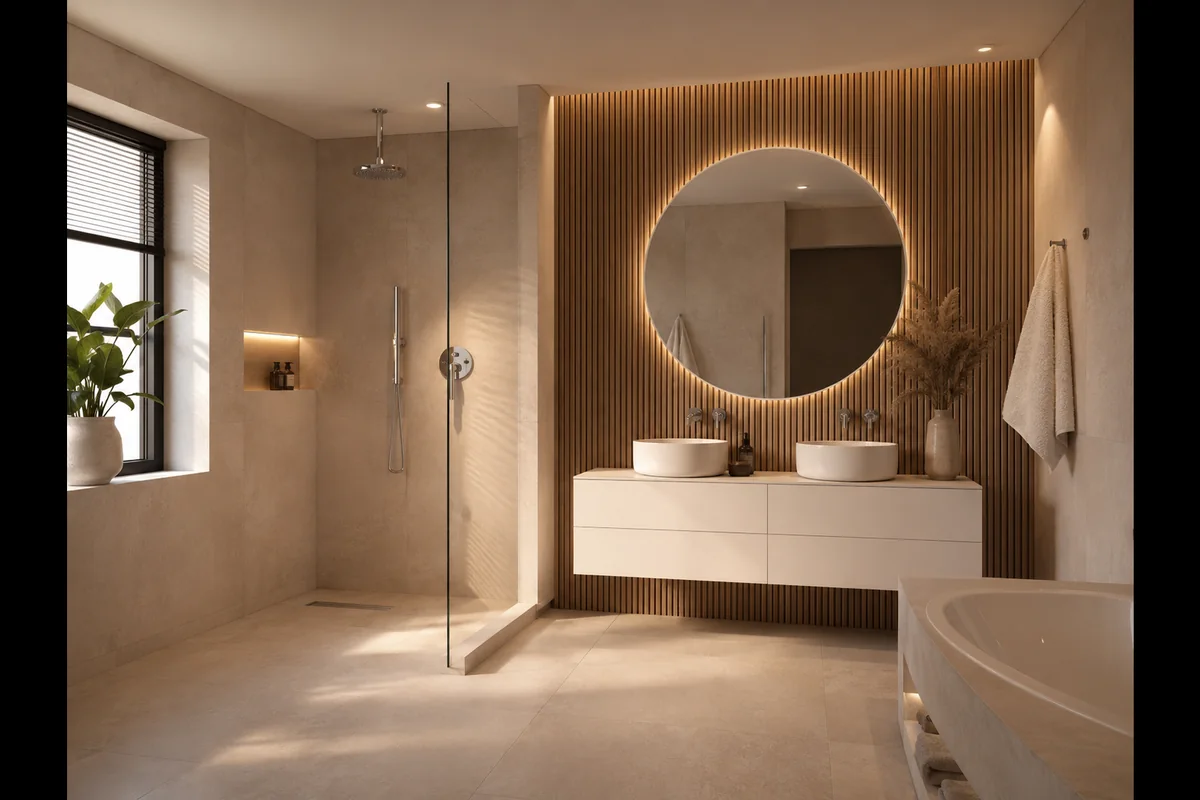
Eastern Docklands – inspired by the converted warehouse districts of Eastern Amsterdam:
- Industrial elements like exposed pipes and concrete
- Matte black fixtures and hardware
- Minimalist wall-hung fixtures
- Micro-cement surfaces
- Factory-style shower enclosures
Before & After Case Studies
Property: 17th-century canal house in the Centrum. Challenge: Tiny bathroom (3m²) with sloping floor and moisture issues. Solution: Complete reconfiguration with space-saving fixtures. Budget: €18,500. Timeline: 5 weeks. Key features:
- Wall-hung toilet to maximize floor space
- Custom-built shower with glass panel instead of door
- Heated floor to address dampness issues
- Built-in medicine cabinet utilizing wall depth
- Vintage-inspired fixtures honoring the building’s age
Property: 1950s apartment in Amsterdam Zuid. Challenge: Outdated layout with separate toilet and tiny shower room. Solution: Combined spaces into single functional bathroom. Budget: €14,500. Timeline: 4 weeks. Key features:
- Removed wall between toilet and shower rooms
- Created wet room with linear drain
- Installed period-appropriate geometric tiles
- Added modest storage solutions
- Preserved and restored original window
Property: 2000s apartment in IJburg. Challenge: Builder-grade fixtures and finishes lacking character. Solution: High-end renovation creating spa-like experience. Budget: €25,000. Timeline: 3 weeks. Key features:
- Large-format porcelain tiles
- Rainfall shower with body jets
- Floating double vanity with integrated lighting
- Smart toilet with integrated bidet functions
- Built-in audio system and chromotherapy lighting
Conclusion: Your Amsterdam Bathroom Renovation Journey
Renovating a bathroom in Amsterdam presents unique challenges but offers tremendous rewards. By understanding the specific considerations of your building type, neighborhood, and personal needs, you can create a bathroom that enhances your daily life while respecting the character of your Amsterdam home.
Final Planning Checklist
As you embark on your renovation journey, remember these essential steps:
- Define your needs and vision clearly before beginning
- Research thoroughly the specific requirements of your building type
- Budget realistically with appropriate contingency for Amsterdam renovations
- Select contractors with specific Amsterdam experience
- Obtain all necessary permissions from authorities and/or VvE
- Choose materials that will perform well in Amsterdam’s climate
- Plan for alternative arrangements during the renovation
- Document the process from beginning to end
- Create a maintenance schedule to protect your investment
- Enjoy your transformed space for years to come
Get Started With Your Amsterdam Bathroom Renovation
Ready to transform your Amsterdam bathroom? Contact our team of specialists for a personalized consultation. With extensive experience renovating bathrooms throughout Amsterdam—from historic canal houses to modern apartments—we can guide you through every step of the process.
Dive deeper with our related guides:
- Top 5 Modern Bathroom Design Trends in Amsterdam
- Cost Breakdown of Bathroom Renovations in the Netherlands
- How to Choose the Right Bathroom Contractor in Amsterdam
- Sustainable Options for Amsterdam Bathroom Renovations